
Email Signatures
It can become tiring to sign your name to every email message that you create. To skip this step, create a signature that is automatically affixed to every email. For help with:
Thunderbird
First, unless you just want a one line signature, create the signature as follows.
- Open Notepad (Start>All programs>Accessories>Notepad
- Create the signature just as you want it to look. If you use the name of an agency, be sure to include the location, folks outside of your general area don't know if Northwestern Hospital is in Chicago or Butte, Montana.
- Save the file as "signature.txt" (Without the quotes of course!). Remember where you saved it!
Then open Thunderbird.
- Go to Tools>Account Settings
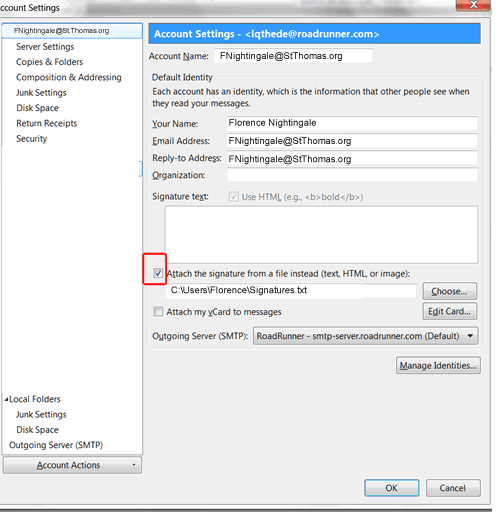
- Under Account Settings, select the account for which you wish this signature to be affixed. In the figure below, there is only one account.
- Click on the box before "Attach the signature from a file."
- Click on the "Choose" box and navigate to the folder where you saved the signature file.
- Click "OK." This signature will now automatically be attached to every outgoing message from this account.

Windows Live Mail
Go to http://explore.live.com/windows-live-mail-create-signature and click on "Show All."
To affix the signature to all your email messages (and you should!), click on "To use signatures in all email." and follow the instructions.
Windows Mail (2007)
- Click on Tools>Options.
- Click on the Signatures Tab.
- Click on New
- Under text, create your Signature.
- Click OK
- Click in the box, Add Signatures to all outgoing messages.
- Click OK
QWest MSN
- Go to Help & Settings>Email settings>writing emails
- Select signatures
- Type in your signature information
- Choose whether to add your signature to all messages, or message by message. (If you select the latter, when you are creating the email click on More>Insert Signature.)
- Click on Save Changes
Created November 4, 2011
© 1999- 2013 Linda Q. Thede & Jeanne P. Sewell